System Configuration – General
This page is used to view and manage global system configuration settings.
The settings on this page control system-wide behavior related to images, email handling, webhooks, and organizational structure. Changes made here affect the entire application.
Purpose
The purpose of this page is to allow system administrators to configure global defaults and behavior that apply across the platform.
This page is typically used when: - Defining default image formats for user cards - Configuring automatic approval behavior - Managing email-related system settings - Setting up system-wide webhooks - Controlling whether organization units can be moved
Changes on this page should be made carefully, as they impact all users and workflows in the system.
Who can access this page
Access to this page is highly restricted and controlled by permissions.
Typically, only users with: - System configuration permissions - System owner or administrator rights
will be able to view and modify these settings.
If this page is not visible, you do not have the required permissions to manage system configuration.
Related nodes
- Primary nodes: System Configuration
- Related nodes: Organization Unit, Person, Request, Permission
System configuration settings influence how other nodes behave but are not directly tied to individual entities.
Page layout
The page is divided into multiple configuration sections, each representing a specific system setting.
Settings are grouped logically and can be updated independently.
Landing Page
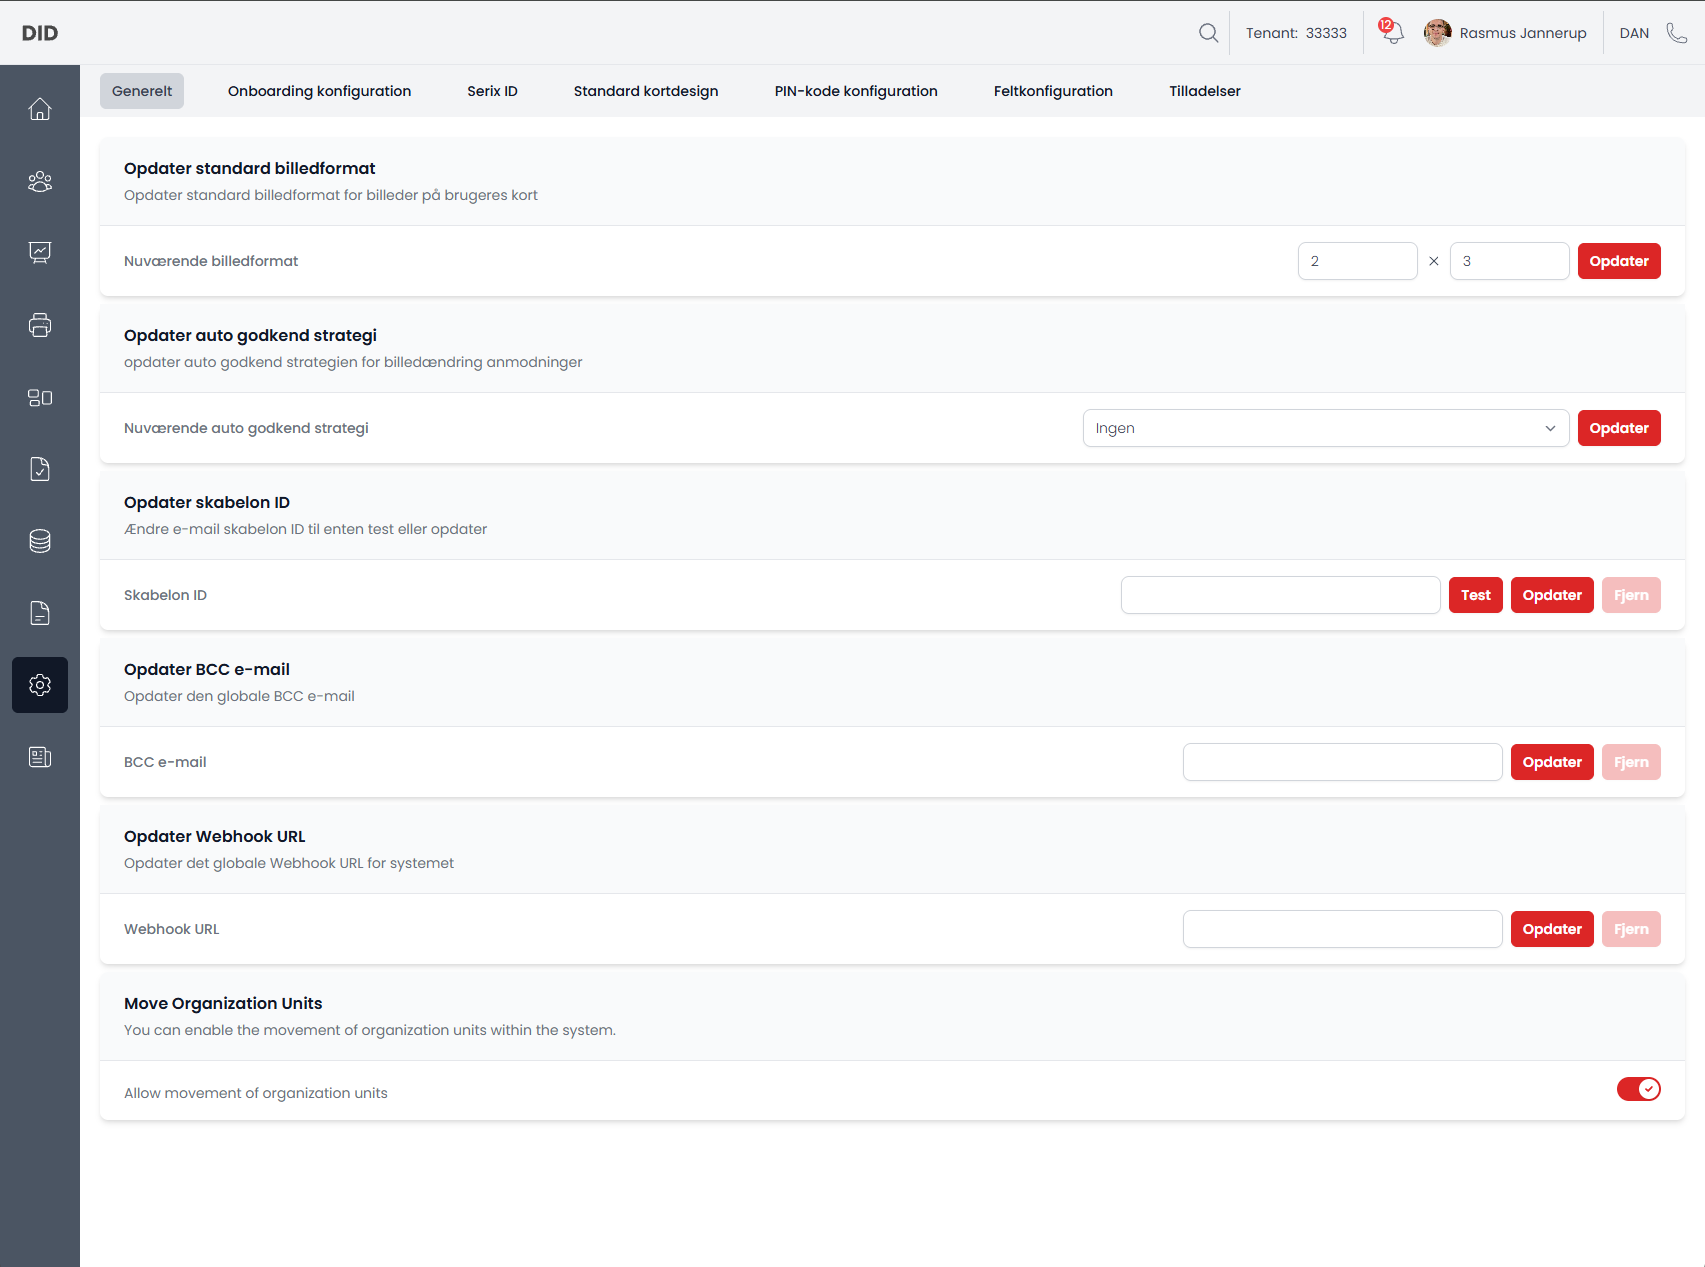
When navigating to System Configuration, the General tab is selected by default.
General Selected
Standard image format
This section allows you to update the default image format used for images on user cards.
You can define the width and height that images should be formatted to when used across the system.
Workflows
- Update the standard image format
Auto-approval strategy
This section controls how picture change requests are automatically approved.
You can select an auto-approval strategy that determines whether picture change requests are approved automatically or require manual review.
Workflows
- Update auto-approval strategy for picture change requests
Email template ID
This section allows you to configure the email template ID used for system-generated emails.
The template ID can be tested before being saved and can also be removed if no longer needed.
Workflows
- Test email template ID
- Update email template ID
- Remove email template ID
BCC email
This section allows you to configure a global BCC email address.
All relevant system emails will include this address as a BCC recipient.
Workflows
- Update global BCC email
- Remove global BCC email
Webhook URL
This section allows you to configure a global webhook URL for the system.
The webhook is used to notify external systems when specific events occur.
Workflows
- Update global webhook URL
- Remove global webhook URL
Move organization units
This section controls whether organization units can be moved within the organizational hierarchy.
When enabled, administrators are allowed to move organization units to different parent nodes.
Workflows
- Enable or disable movement of organization units
Sections
Onboarding Configuration Selected

When you navigate to the onboarding configuration section you will be greeted by a card with multiple sliders that allows you to setup onboarding, which will be used by the user the first time they use the application/Digital ID
Workflows
- Enable if a user has to upload a picture when onboarding
- Enable if a user has to update their pincode when onboarding
- Enable if a user has to request access to a resource when onboarding
- Enable if a user has to accept a disclamer/terms and condition when onboarding
Serix ID Selected
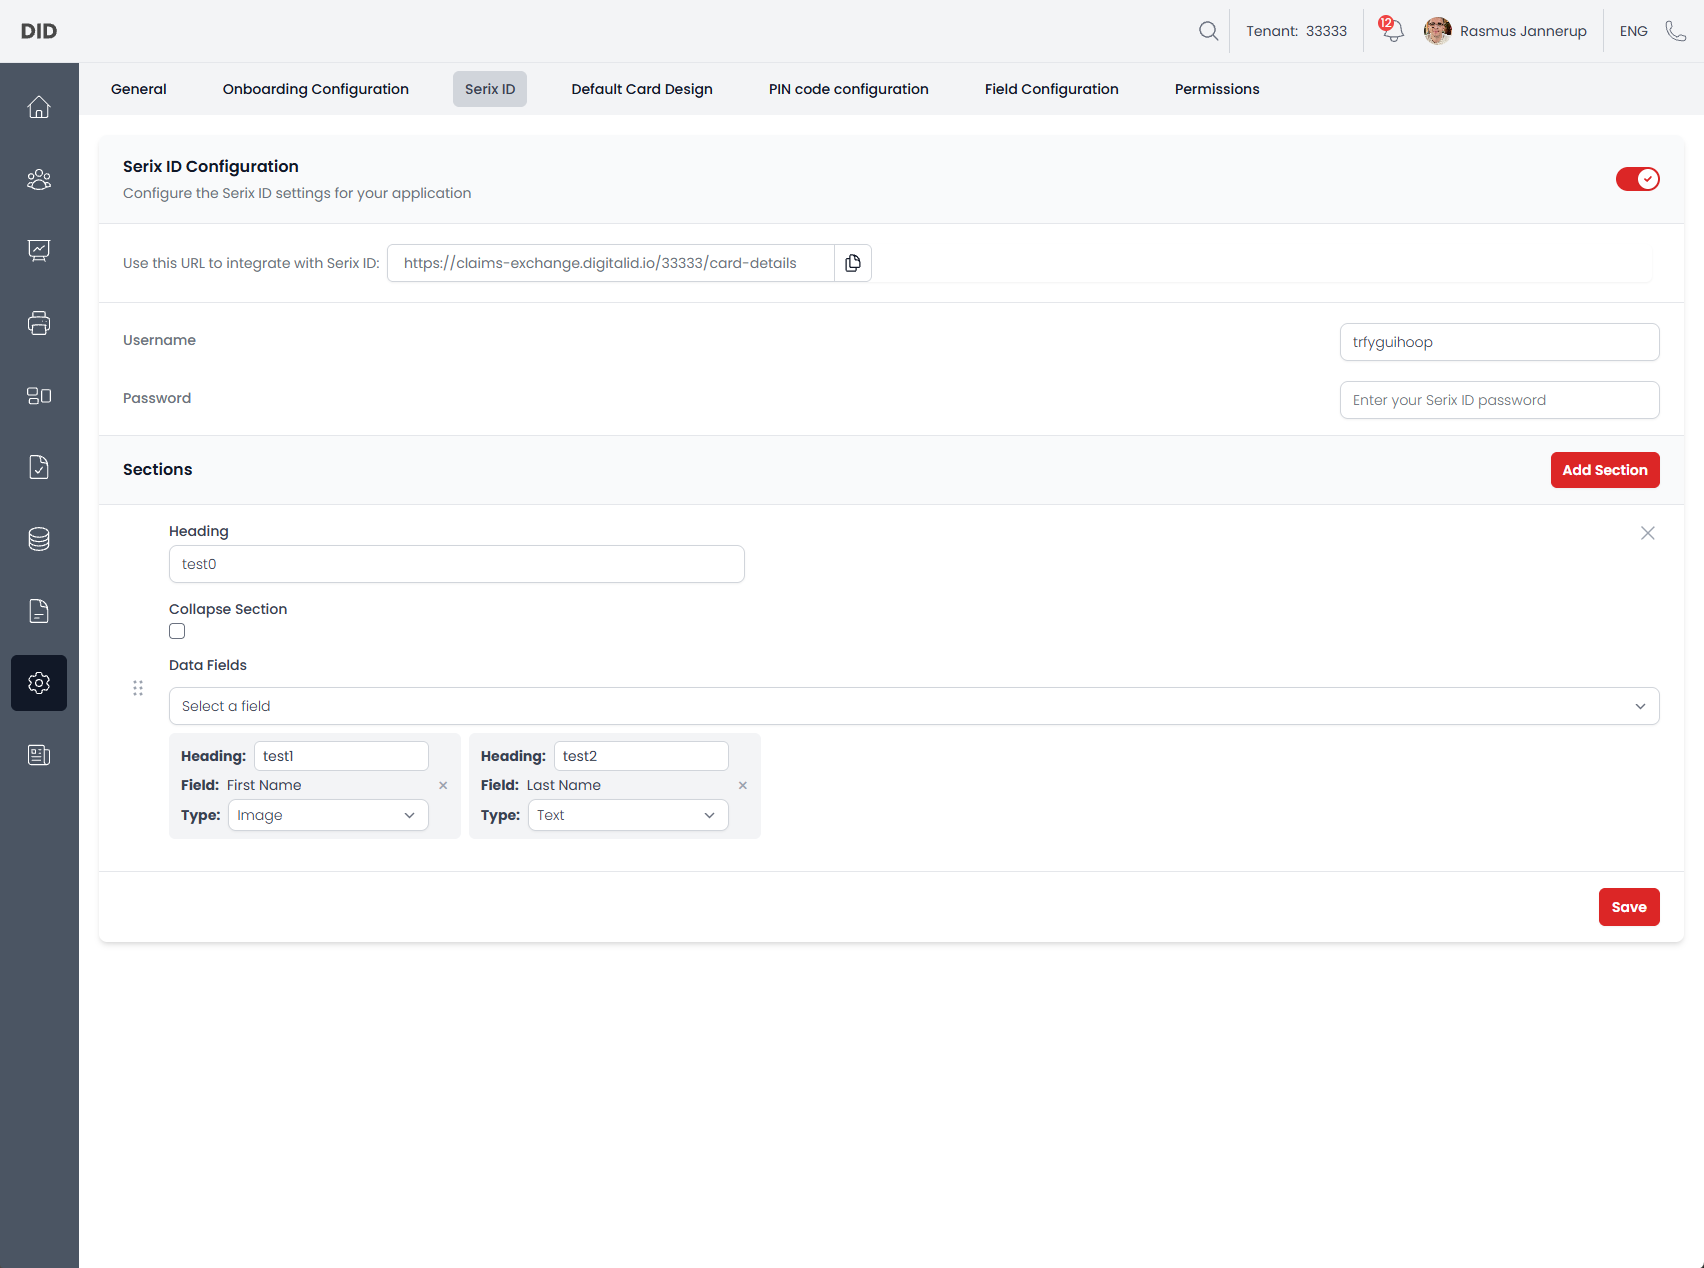
When you navigate to the Serix Id Configuration you will be greeted by are more complex configuration. You can enable the configuration via the slider in the top and make your way through it. You start by setting a username and password and then you build the sections that you want to include.
The sections include: - A heading - If the section is collapsed - Datafields
The data fields also have a heading and a type they represent.
Everything is draggable and can be sorted by the user. Data fields can be moved inside a section and section can be moved above or below another section.
Default Card Design Selected
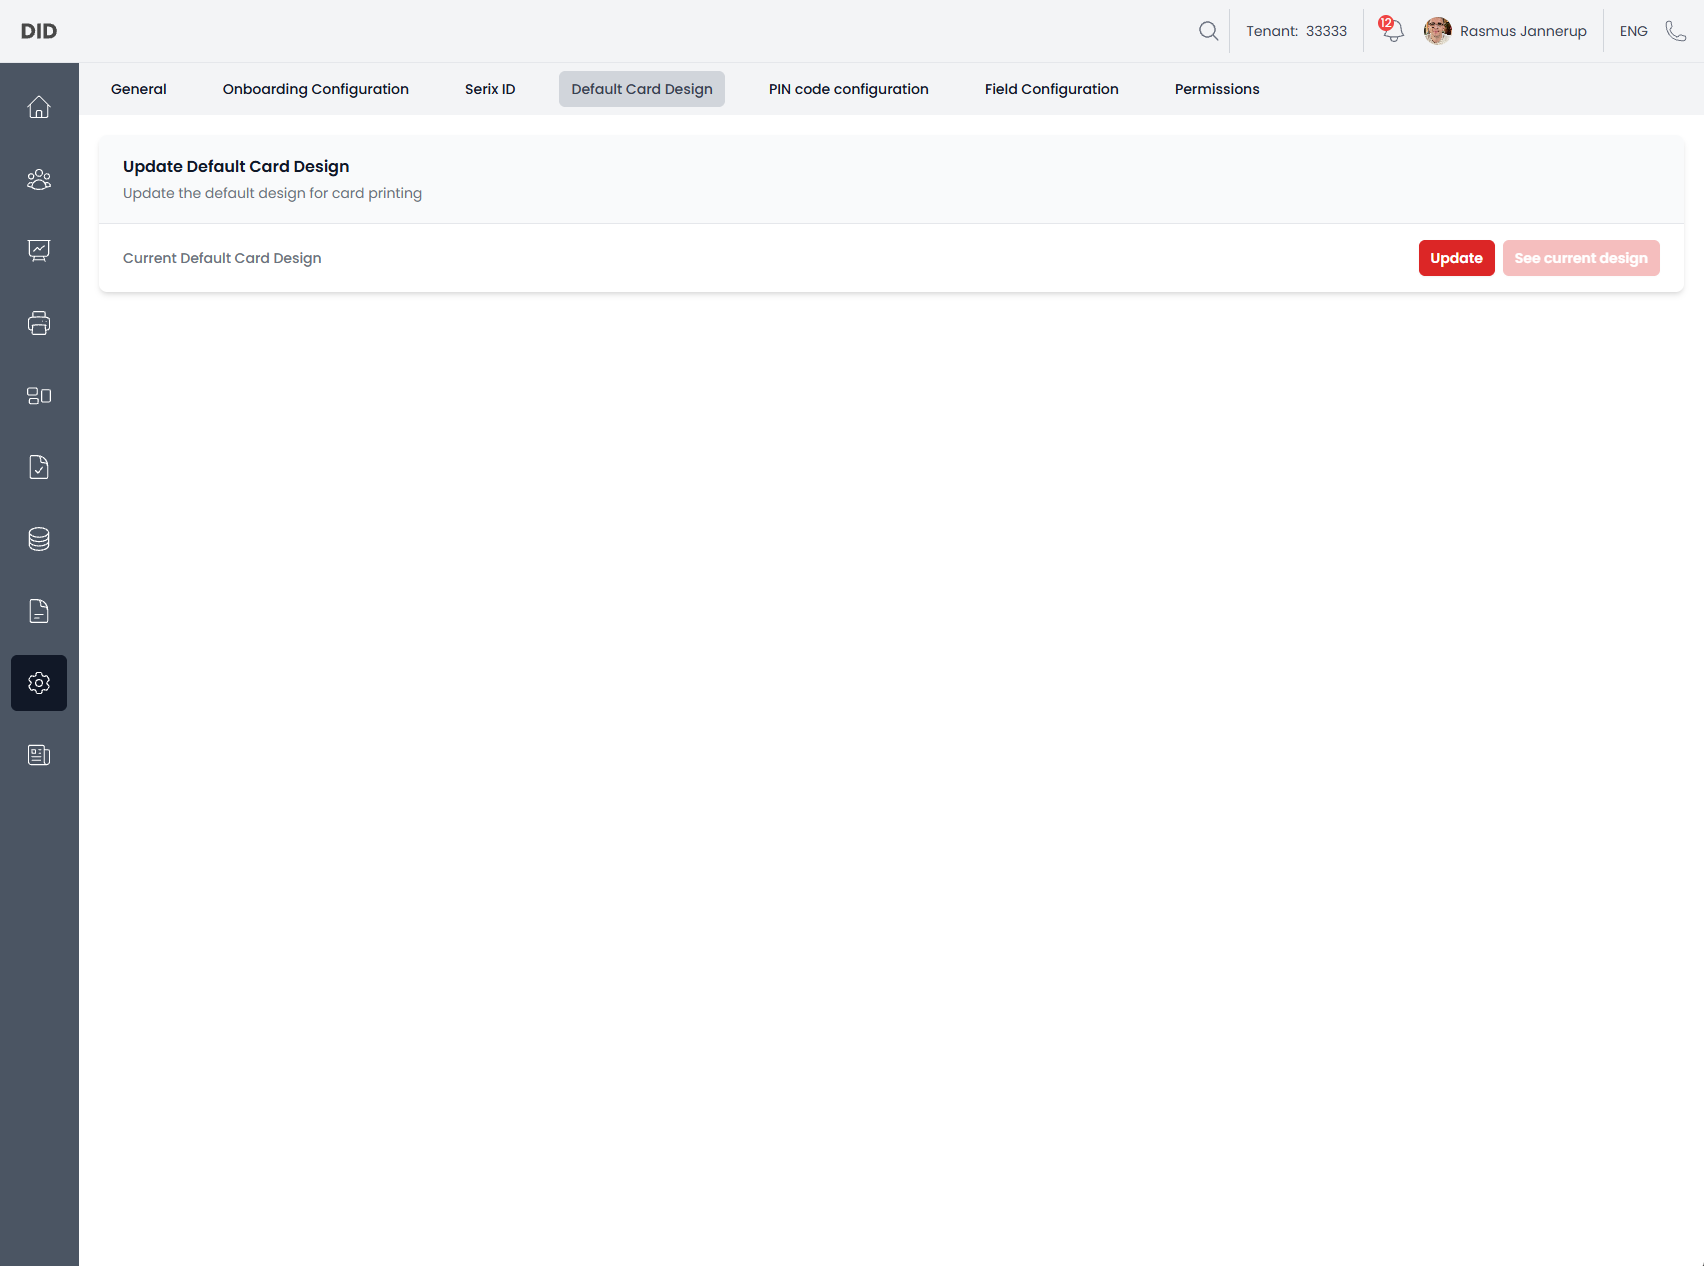
When you navigate to the Default Card Design section you will be able to view the already available default card design og upload a new one.
Workflows
- Update the default card design as
.svg
PIN Code Configuration Selected
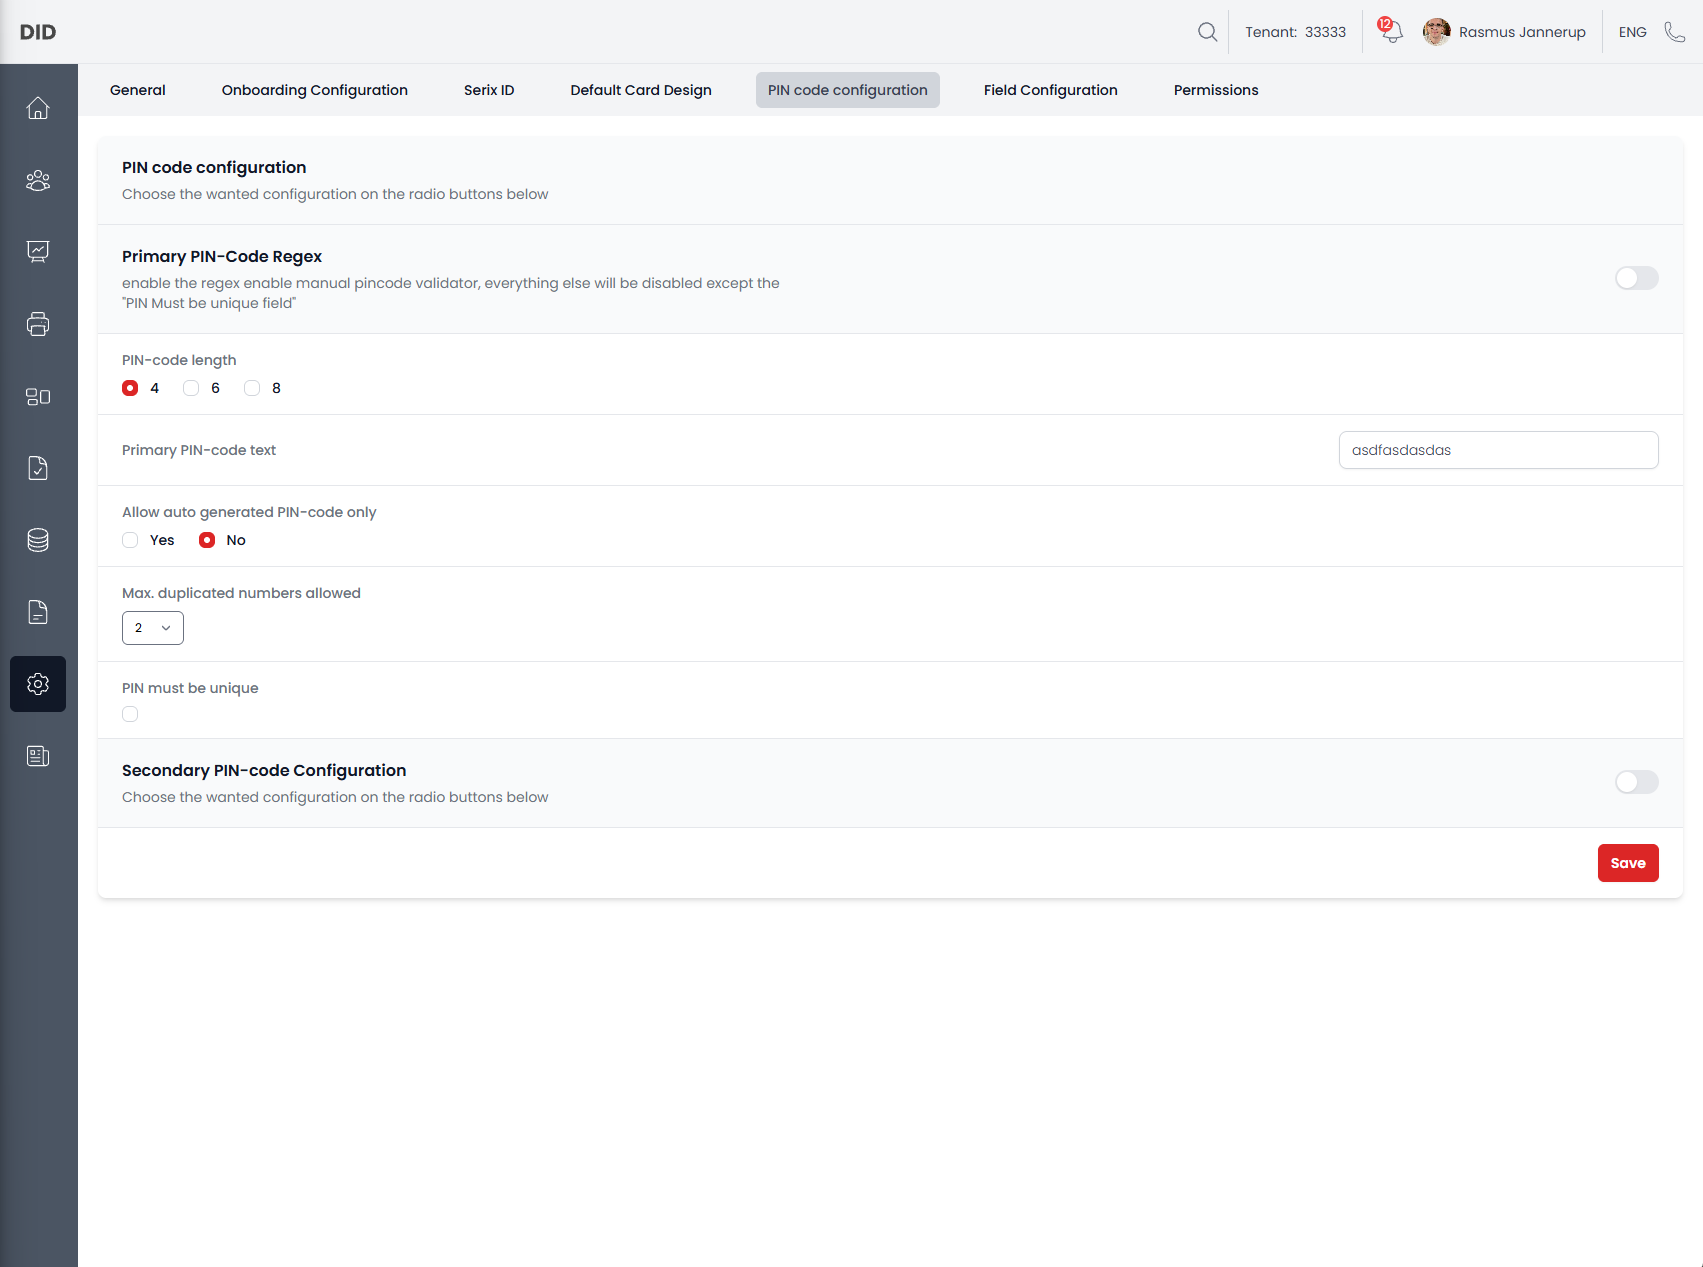
When you navigate to the PIN Code Configuration Section you will be able to update how the user views and uses the PIN codes.
You can set both primary and secondary PIN code configurations which includes: - REGEX - Length - Button text - Auto generated only - Max duplicate number and - If they have to be unique
Workflows
- Update the primary PIN code configuration
- Update the secondary PIN code configuration
Field Configuration Selected
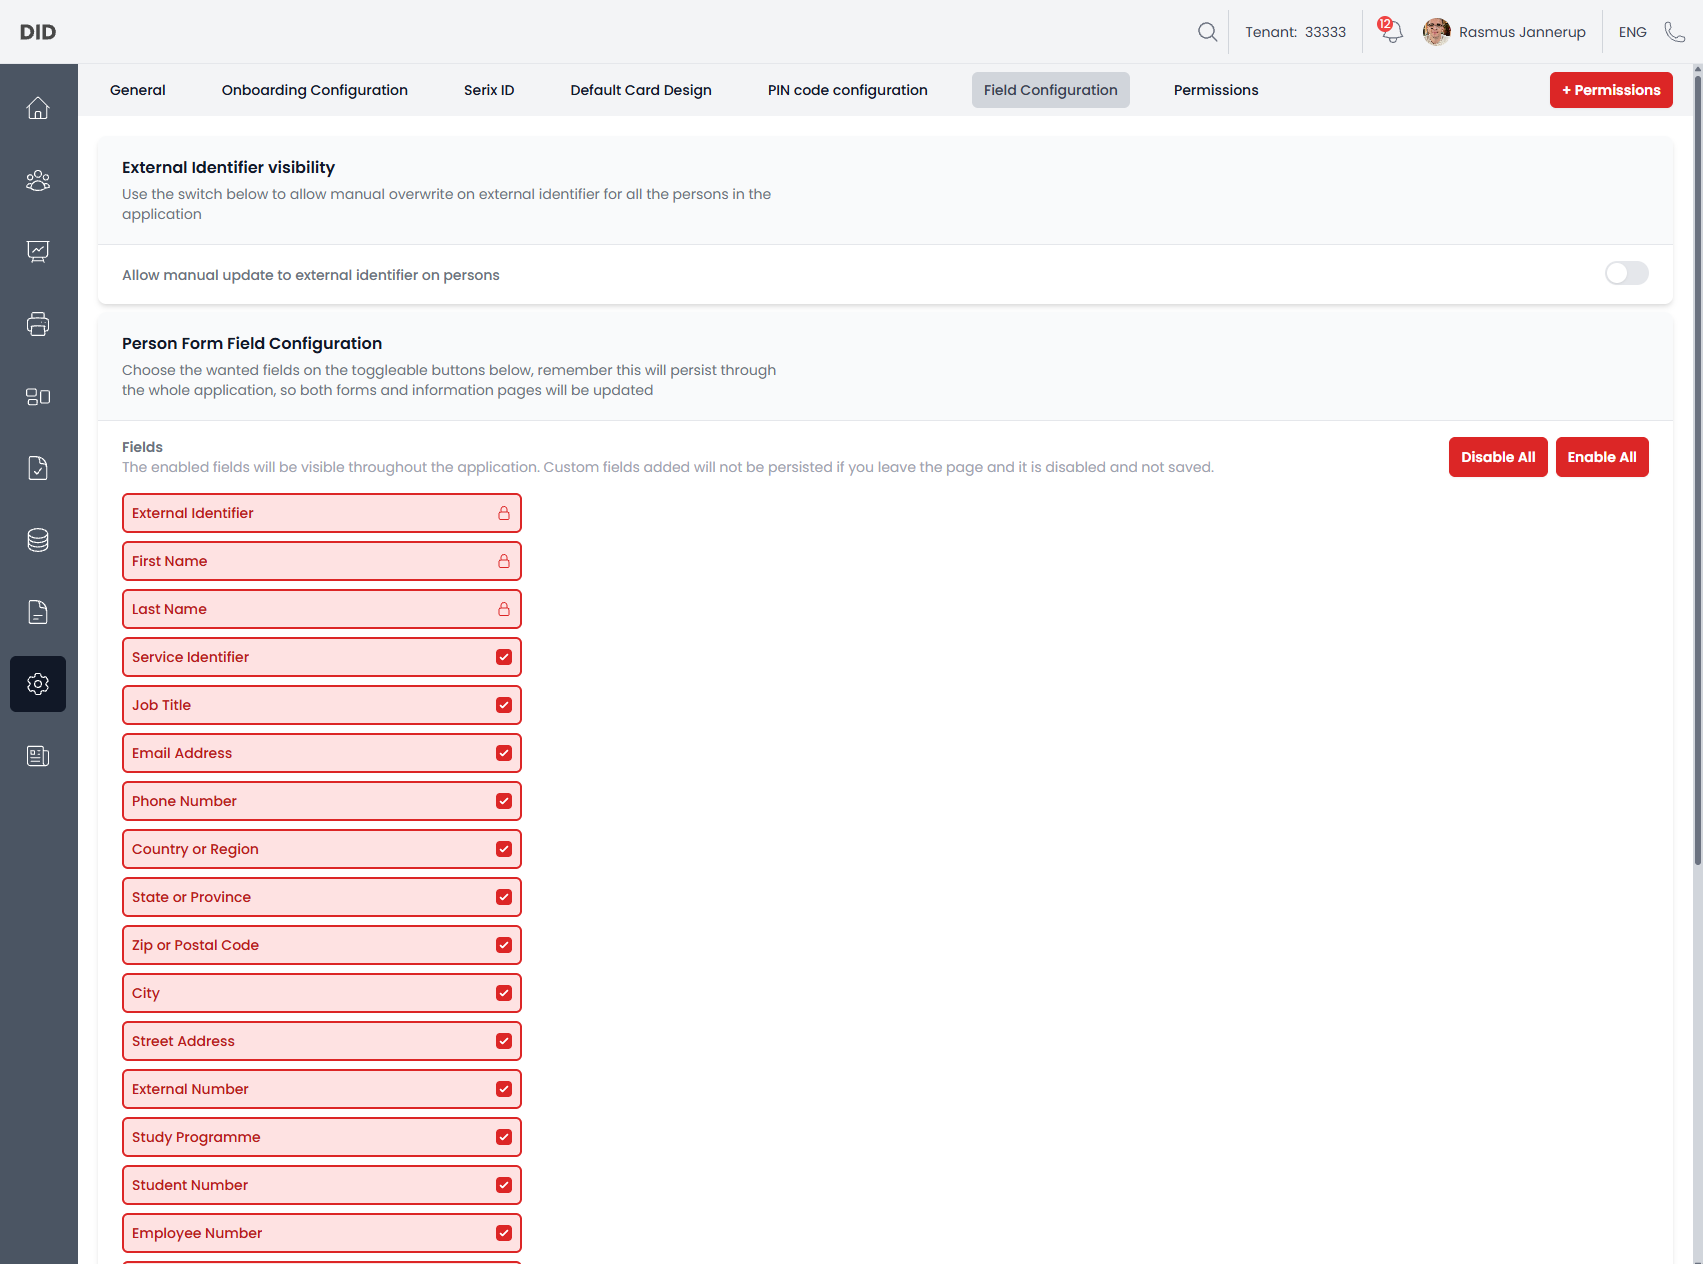
When the Field Configuration section has been selected you will be able to update what fields are visible on a Person Entity, this also includes adding custom ones and what type they will have.
Workflows
- Update External Identifier visibility
- Update Person fields
Permissions selected
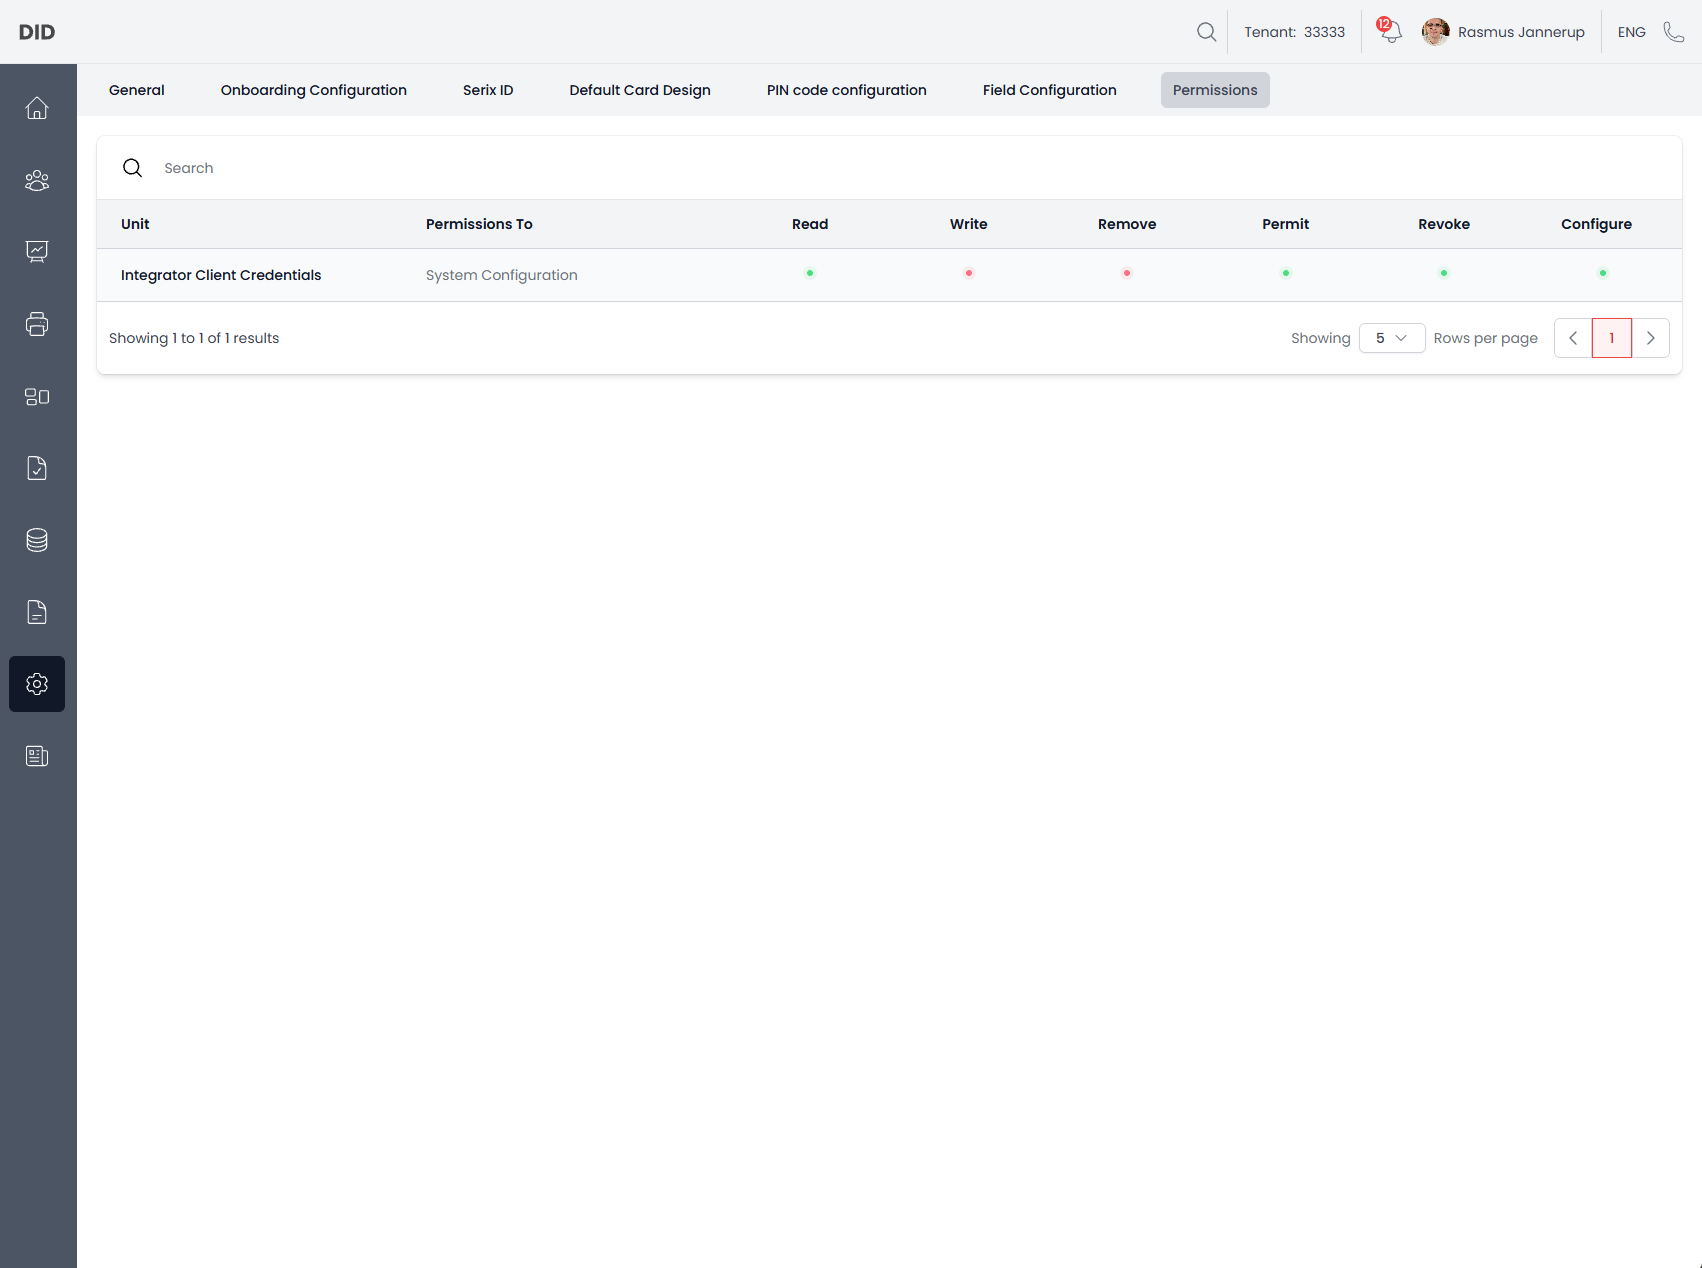
When the Permissions sections is selected you will be able to view which entities have permissions to the System configuration. You will not be able to add permissions in this tab, you have to navigate to the node that needs the permissions and use the add permission workflow on that node to System Configuration.
Common usage notes
- All changes take effect immediately after being saved.
- Incorrect configuration may impact multiple workflows across the system.
- Webhook URLs should be validated before use.
- Email-related settings should be tested to ensure correct delivery.
- Some configuration options may be hidden or disabled depending on permissions.
- Permissions needs to be added directly on the node that needs System Configuration Permissions not the System Configuration itself